
Countertop Thickness: 2cm vs 3cm in Portland, Oregon
Countertop Thickness: 2cm vs 3cm in Portland, Oregon
Countertop Thickness: 2cm vs 3cm in Portland, Oregon
What 2cm and 3cm Actually Mean
What 2cm and 3cm Actually Mean
Stone slabs are sold in metric thickness, which is why you'll hear centimeters even though every other measurement in your remodel is in inches. The two standard options are:
2cm — roughly 3/4 inch. The thinner standard, common in Europe, in commercial work, in bathroom vanities, and in a lot of production-builder kitchens.
3cm — roughly 1-1/4 inch. The dominant residential standard in the United States, and what most Portland homeowners picture when they imagine a stone countertop.
There is also 1.2cm and 2cm porcelain used for wall cladding and some ultra-thin European looks, and occasionally 6cm slabs cut for monolithic statement islands — but those are specialty situations. For a normal kitchen or bath remodel, you are choosing between 2 and 3.
Here's the part that surprises people: the thickness of the slab and the thickness of the finished edge are not the same thing. A 2cm slab can be finished to look like a 3cm, 4cm or even 6cm countertop by laminating or mitering additional material onto the front edge. Conversely, a 3cm slab can be built up to a dramatic 6cm or 8cm waterfall edge. The slab is the raw input. The edge is a fabrication decision.
So the real question isn't "2cm or 3cm." It's "what finished edge thickness do I want, and what's the smartest way to get there?"
Mitered vs. Laminated Edges: The Detail That Separates Shops
Mitered vs. Laminated Edges: The Detail That Separates Shops
If you want a thick, substantial edge — 4cm, 6cm, or a chunky waterfall island — the fabricator builds it up. There are two ways to do that, and the difference in quality is enormous.
Laminated edge (stacked). A strip of the same slab is glued to the underside of the countertop edge, then the whole assembly is shaped and polished as one. It's faster and cheaper. The downside is the seam: because the strip is cut from a different part of the slab and butted flat against the underside, the veining rarely lines up and you can often see a horizontal glue line running the length of the counter. On a busy granite it disappears. On a white marble-look quartz with strong veining, it can be very visible.
Mitered edge. Both pieces are cut at a 45-degree angle and joined at the corner, so the top surface's veining wraps continuously around the edge. Done well, a mitered edge looks like the countertop was carved from a single thick block of stone. There is no visible glue line at the top corner, and on veined material the pattern flows over the edge exactly as it would in solid stone.
Mitering costs more because it's real work: precise angle cuts on a CNC saw, careful dry-fitting, color-matched epoxy, and hand polishing to knock down the corner so it reads as solid. It's also where you find out whether your fabricator has the equipment and the patience. A sloppy miter with a gap, a mismatched color epoxy, or veining that abruptly stops at the corner looks worse than a clean laminated edge would have.
Our general guidance for Portland-area homeowners: if you're spending real money on a dramatically veined slab, miter it. The entire point of a statement stone is visual continuity, and a laminated edge undercuts that at the most visible line in the kitchen. If you're working with a subtle, uniform material — a plain white quartz, a speckled granite, a concrete-look porcelain — a laminated edge is a perfectly sensible place to save money because nobody will ever see the difference.
Structural Reality: Where Thickness Genuinely Matters
Structural Reality: Where Thickness Genuinely Matters
Marketing aside, thickness has real engineering consequences. Stone is strong in compression and comparatively weak in tension — it resists being crushed far better than it resists being bent. That's why unsupported spans are where thickness earns its money.
Overhangs. As a general rule of thumb for natural stone and quartz, 3cm material can cantilever roughly 10 to 12 inches unsupported, while 2cm material should be limited to about 6 to 8 inches. Beyond those numbers you need support — steel plate, corbels, or a plywood substrate. If you're planning a breakfast bar with counter-height seating and a 14 to 15 inch overhang for knees, that's not a "thicker is nicer" preference, that's a structural requirement with hidden steel underneath regardless of thickness.
Sink cutouts. Undermount sinks put a lot of stress on the narrow rail of stone in front of the bowl. 3cm handles that comfortably. 2cm undermount installs are absolutely doable — done constantly in Europe — but they want a rodded or reinforced front rail and a fabricator who's paying attention. If you're going 2cm with a large single-bowl undermount, ask specifically how the front rail is being reinforced.
Cooktop cutouts. Same logic. A drop-in cooktop leaves narrow strips of stone front and back. Thicker material is more forgiving, thinner material needs care during fabrication and transport.
Substrate. 2cm countertops in the US are typically installed over a plywood deck, which adds labor and material but also adds stiffness. 3cm installs directly to the cabinet frame in most cases. This is part of why the price gap between the two is smaller than the raw material cost difference suggests — you save on stone and spend it back on substrate and labor.
One thing that is not materially different: everyday durability. A 2cm quartz counter is not going to crack because you set a hot pan on it or lean on the edge. Failures in thin stone almost always trace back to an unsupported span, a poorly cut sink rail, or damage during handling — not to the thickness itself being inadequate for kitchen use.
Still working out a budget? Get an installed price from your own measurements in about two minutes with the Alpine Stones instant quote tool, or call (503) 837-1980 to talk it through with a real person.
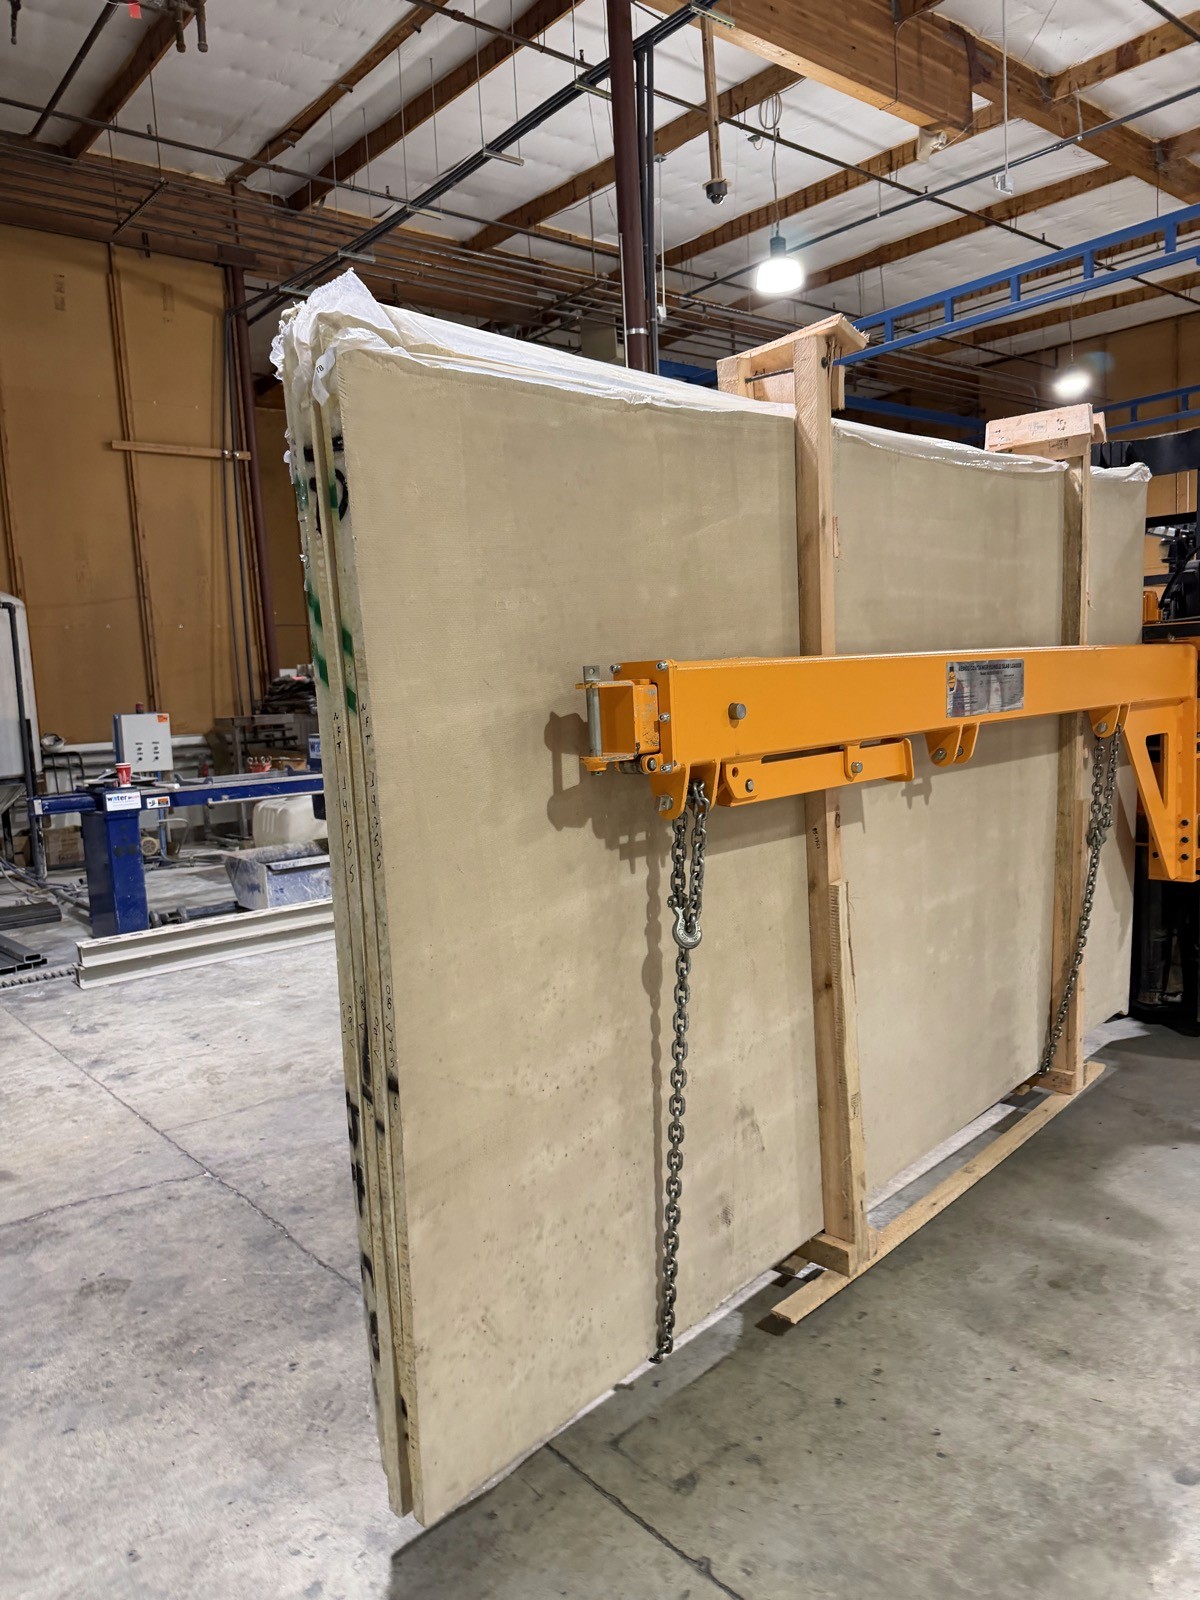
How Thickness Changes the Look of a Room
Setting engineering aside, thickness is a design language. Different thicknesses say different things, and matching them to your architecture matters more than picking a "better" number.
2cm reads light, modern and European. A thin profile pairs beautifully with flat-panel slab cabinetry, minimalist hardware, and contemporary architecture. It's what you see in high-end Italian and Scandinavian kitchens. In a Portland modern build or a clean-lined condo remodel, a 2cm eased edge can look far more sophisticated than a chunky counter would.
3cm reads substantial and traditional-to-transitional. It's the American default for a reason — it looks solid, it suits Shaker cabinetry and framed doors, and it holds up visually in the larger kitchens common in Lake Oswego, West Linn and Camas. If your kitchen has any traditional detailing, 3cm is almost always the safer choice.
4cm to 6cm mitered reads architectural and intentional. This is the current high-end look: a thick, monolithic island edge, often paired with a waterfall panel down the sides. It signals custom work. Used well it's stunning. Used on every surface in the kitchen it starts to feel heavy, which is why most designers run the thick miter only on the island and keep the perimeter counters at standard thickness.
Scale matters. A thick edge on a small galley kitchen closes the space in. A thin 2cm edge on a twelve-foot island can look flimsy relative to the mass of the cabinetry beneath it. Walk your actual kitchen, look at the cabinet dimensions and ceiling height, and pick the profile that's proportional — not the one that photographed well on Pinterest in someone else's house.
Vanities are their own category. Bathroom countertops carry no real structural load and read better thin. 2cm on a vanity is not a compromise, it's frequently the better design call — and it lets you spend the savings on a nicer slab or an integrated stone sink.
The Spec Nobody Explains Until It's Too Late

Most countertop conversations in Portland start and end with two things: what material, and what color. Thickness almost never comes up — until the quote arrives and there's a line item for a "mitered edge build-up" that adds a thousand dollars, or until the countertops are installed and the homeowner realizes the edge looks thinner and more builder-grade than the showroom sample they fell in love with.
Slab thickness is one of the few countertop decisions that affects everything at once: the visual weight of your kitchen, the structural requirements underneath, how much overhang you can run on an island, what edge profiles are even possible, and the final price. It is also one of the easiest places for a shop to quietly cut cost in a way you won't notice on paper but will notice every day for the next twenty years.
This guide walks through what 2cm and 3cm actually mean, when each one makes sense, how mitered and laminated edges work, and what we recommend to homeowners across Portland, Beaverton, Lake Oswego and Vancouver WA. No upselling — some of the best kitchens we've fabricated are 2cm, and some of the worst value decisions we've seen were people paying for thickness they didn't need.
The Spec Nobody Explains Until It's Too Late
Most countertop conversations in Portland start and end with two things: what material, and what color. Thickness almost never comes up — until the quote arrives and there's a line item for a "mitered edge build-up" that adds a thousand dollars, or until the countertops are installed and the homeowner realizes the edge looks thinner and more builder-grade than the showroom sample they fell in love with.
Slab thickness is one of the few countertop decisions that affects everything at once: the visual weight of your kitchen, the structural requirements underneath, how much overhang you can run on an island, what edge profiles are even possible, and the final price. It is also one of the easiest places for a shop to quietly cut cost in a way you won't notice on paper but will notice every day for the next twenty years.
This guide walks through what 2cm and 3cm actually mean, when each one makes sense, how mitered and laminated edges work, and what we recommend to homeowners across Portland, Beaverton, Lake Oswego and Vancouver WA. No upselling — some of the best kitchens we've fabricated are 2cm, and some of the worst value decisions we've seen were people paying for thickness they didn't need.
Cost, Availability, and What to Ask Your Fabricator
On cost. Per square foot of raw slab, 2cm runs meaningfully less than 3cm in the same material — you're buying less stone. But the installed price gap narrows considerably once you add the plywood substrate, extra labor, and any edge build-up. If you take 2cm and then miter it to look like 3cm, you will typically spend more than just buying 3cm in the first place. The honest cost hierarchy, cheapest to most expensive, usually runs: 2cm eased edge → 3cm eased or standard profile → 2cm laminated to 4cm → 3cm mitered to 6cm → waterfall island with book-matched miters.
On availability. This is the practical constraint that decides it for a lot of people. In the Pacific Northwest, the deepest inventory of quartz and granite is in 3cm. Many exotic and designer slabs simply don't come to this market in 2cm. Porcelain, by contrast, is mostly thin. If you have your heart set on a specific slab, its available thickness may make the decision for you — which is one more reason to look at real slabs early rather than choosing from a two-inch sample chip.
Questions worth asking any shop you're quoting:
What thickness is this quote based on, and is the edge build-up mitered or laminated?
If it's laminated, will the glue line be visible on this particular slab's pattern?
What's my longest unsupported overhang, and what support is specified?
Is the sink rail being rodded or reinforced?
If 2cm — is plywood substrate included in this price, or is it an add?
For where thickness lands in a full budget, see our 2026 Portland and Vancouver WA countertop cost guide. A good fabricator will answer all five without hesitating. If the answers are vague, that itself is useful information.
Frequently asked questions
Is 2cm or 3cm countertop thickness better?
Neither is universally better. 3cm (about 1-1/4 inch) is the dominant residential standard in the United States, stands on its own and takes a true undermount sink. 2cm (about 3/4 inch) is correct and cost-effective for bathroom vanities, vertical work and commercial applications, but in a kitchen it needs a plywood substrate and usually a built-up edge.
Does a 2cm countertop actually save money?
Less than people expect. The slab costs less per square foot, but the substrate and the laminated or mitered edge buildup add fabrication labor that eats much of the saving. The question to ask your fabricator is whether the substrate and edge buildup are inside the quoted number or added later.
Can a 2cm slab look as thick as 3cm?
Yes. Slab thickness and finished edge thickness are not the same thing. A 2cm slab can be laminated or mitered to read as 3cm, 4cm or even 6cm at the edge, and a 3cm slab can be built up to a dramatic waterfall edge. The slab is the raw input; the edge is a fabrication decision.
See the Difference in Person
Thickness is genuinely hard to judge from photos. A 2cm edge and a 3cm edge look nearly identical on a screen, and a mitered 6cm island looks like a rendering until you stand next to one. The fastest way to settle this decision is to put your hand on both.
At Alpine Stones we fabricate in both thicknesses, miter in-house, and we'll tell you honestly when a thicker edge isn't worth the money for your particular kitchen. Bring your cabinet door sample and your layout, and we'll walk you through real slabs and real edge samples so you can see how each option will actually read in your space.
Related reading
Edge profiles — how the shape of the edge interacts with the thickness you choose.
Seam planning — where thickness helps hide a joint and where it does not.
Waterfall islands — the build-up that most often drives a thickness decision.
Our installation process — template through install day, step by step.
2026 cost guide — installed pricing by material and edge.
Not sure which thickness your kitchen needs? Call Alpine Stones at (503) 837-1980 for a free measure and an itemized written quote that spells out slab thickness, edge build-up method, and any required support. We will tell you when the cheaper option is the right one.
Alpine Stones
5512 NE 105th Ave, Portland, OR 97220
(503) 837-1980
CCB# 223660
Serving Portland, Beaverton, Hillsboro, Lake Oswego, Tigard, Gresham, and Vancouver WA.
Thickness drives price more than almost any other spec, so price it before you commit. Our instant countertop quote tool lets you pick 2cm or 3cm, enter your measurements, and see the installed difference in a few minutes. No sales visit required. Prefer to talk it through? Call Alpine Stones at (503) 837-1980.
Building outside? Thickness rules change once the slab leaves the kitchen. See outdoor kitchen countertops in Portland for why 3cm is effectively mandatory on an exterior run.
Doing a small run like a vanity, bar top or hearth? You may not need a full slab at all. See countertop remnants in Portland for how to get 3cm real stone on a small footprint at a fraction of full-slab material cost. Call Alpine Stones at (503) 837-1980 and we will tell you what is on the remnant rack this week.

Terms & Conditions
CCB#: 223660
COPYRIGHT 2025 ALPINE STONES, INC
__________________________________________________________________________________________________________________________________________________________________________________________________________________________________________________________________________________
RESOURCES
STAY CONNECTED
Mon-Fri / 9am-4pm




CCB#: 223660
COPYRIGHT 2025 ALPINE STONES, INC
__________________________________________________________________________________________________________________________________________________________________________________________________________________________________________________________________________________
Terms & Conditions
CCB#: 223660
COPYRIGHT 2025 ALPINE STONES, INC
__________________________________________________________________________________________________________________________________________________________________________________________________________________________________________________________________________________
RESOURCES
STAY CONNECTED
Mon-Fri / 9am-4pm
Terms & Conditions
CCB#: 223660
COPYRIGHT 2025 ALPINE STONES, INC
__________________________________________________________________________________________________________________________________________________________________________________________________________________________________________________________________________________
RESOURCES
STAY CONNECTED
Mon-Fri / 9am-4pm

See the Difference in Person
Thickness is genuinely hard to judge from photos. A 2cm edge and a 3cm edge look nearly identical on a screen, and a mitered 6cm island looks like a rendering until you stand next to one. The fastest way to settle this decision is to put your hand on both.
At Alpine Stones we fabricate in both thicknesses, miter in-house, and we'll tell you honestly when a thicker edge isn't worth the money for your particular kitchen. Bring your cabinet door sample and your layout, and we'll walk you through real slabs and real edge samples so you can see how each option will actually read in your space.
Related reading
Edge profiles — how the shape of the edge interacts with the thickness you choose.
Seam planning — where thickness helps hide a joint and where it does not.
Waterfall islands — the build-up that most often drives a thickness decision.
Our installation process — template through install day, step by step.
2026 cost guide — installed pricing by material and edge.
Not sure which thickness your kitchen needs? Call Alpine Stones at (503) 837-1980 for a free measure and an itemized written quote that spells out slab thickness, edge build-up method, and any required support. We will tell you when the cheaper option is the right one.
Alpine Stones
5512 NE 105th Ave, Portland, OR 97220
(503) 837-1980
CCB# 223660
Serving Portland, Beaverton, Hillsboro, Lake Oswego, Tigard, Gresham, and Vancouver WA.
Thickness drives price more than almost any other spec, so price it before you commit. Our instant countertop quote tool lets you pick 2cm or 3cm, enter your measurements, and see the installed difference in a few minutes. No sales visit required. Prefer to talk it through? Call Alpine Stones at (503) 837-1980.
Building outside? Thickness rules change once the slab leaves the kitchen. See outdoor kitchen countertops in Portland for why 3cm is effectively mandatory on an exterior run.
Doing a small run like a vanity, bar top or hearth? You may not need a full slab at all. See countertop remnants in Portland for how to get 3cm real stone on a small footprint at a fraction of full-slab material cost. Call Alpine Stones at (503) 837-1980 and we will tell you what is on the remnant rack this week.
Cost, Availability, and What to Ask Your Fabricator
On cost. Per square foot of raw slab, 2cm runs meaningfully less than 3cm in the same material — you're buying less stone. But the installed price gap narrows considerably once you add the plywood substrate, extra labor, and any edge build-up. If you take 2cm and then miter it to look like 3cm, you will typically spend more than just buying 3cm in the first place. The honest cost hierarchy, cheapest to most expensive, usually runs: 2cm eased edge → 3cm eased or standard profile → 2cm laminated to 4cm → 3cm mitered to 6cm → waterfall island with book-matched miters.
On availability. This is the practical constraint that decides it for a lot of people. In the Pacific Northwest, the deepest inventory of quartz and granite is in 3cm. Many exotic and designer slabs simply don't come to this market in 2cm. Porcelain, by contrast, is mostly thin. If you have your heart set on a specific slab, its available thickness may make the decision for you — which is one more reason to look at real slabs early rather than choosing from a two-inch sample chip.
Questions worth asking any shop you're quoting:
What thickness is this quote based on, and is the edge build-up mitered or laminated?
If it's laminated, will the glue line be visible on this particular slab's pattern?
What's my longest unsupported overhang, and what support is specified?
Is the sink rail being rodded or reinforced?
If 2cm — is plywood substrate included in this price, or is it an add?
For where thickness lands in a full budget, see our 2026 Portland and Vancouver WA countertop cost guide. A good fabricator will answer all five without hesitating. If the answers are vague, that itself is useful information.
Frequently asked questions
Is 2cm or 3cm countertop thickness better?
Neither is universally better. 3cm (about 1-1/4 inch) is the dominant residential standard in the United States, stands on its own and takes a true undermount sink. 2cm (about 3/4 inch) is correct and cost-effective for bathroom vanities, vertical work and commercial applications, but in a kitchen it needs a plywood substrate and usually a built-up edge.
Does a 2cm countertop actually save money?
Less than people expect. The slab costs less per square foot, but the substrate and the laminated or mitered edge buildup add fabrication labor that eats much of the saving. The question to ask your fabricator is whether the substrate and edge buildup are inside the quoted number or added later.
Can a 2cm slab look as thick as 3cm?
Yes. Slab thickness and finished edge thickness are not the same thing. A 2cm slab can be laminated or mitered to read as 3cm, 4cm or even 6cm at the edge, and a 3cm slab can be built up to a dramatic waterfall edge. The slab is the raw input; the edge is a fabrication decision.
See the Difference in Person
Thickness is genuinely hard to judge from photos. A 2cm edge and a 3cm edge look nearly identical on a screen, and a mitered 6cm island looks like a rendering until you stand next to one. The fastest way to settle this decision is to put your hand on both.
At Alpine Stones we fabricate in both thicknesses, miter in-house, and we'll tell you honestly when a thicker edge isn't worth the money for your particular kitchen. Bring your cabinet door sample and your layout, and we'll walk you through real slabs and real edge samples so you can see how each option will actually read in your space.
Related reading
Edge profiles — how the shape of the edge interacts with the thickness you choose.
Seam planning — where thickness helps hide a joint and where it does not.
Waterfall islands — the build-up that most often drives a thickness decision.
Our installation process — template through install day, step by step.
2026 cost guide — installed pricing by material and edge.
Not sure which thickness your kitchen needs? Call Alpine Stones at (503) 837-1980 for a free measure and an itemized written quote that spells out slab thickness, edge build-up method, and any required support. We will tell you when the cheaper option is the right one.
Alpine Stones
5512 NE 105th Ave, Portland, OR 97220
(503) 837-1980
CCB# 223660
Serving Portland, Beaverton, Hillsboro, Lake Oswego, Tigard, Gresham, and Vancouver WA.
Thickness drives price more than almost any other spec, so price it before you commit. Our instant countertop quote tool lets you pick 2cm or 3cm, enter your measurements, and see the installed difference in a few minutes. No sales visit required. Prefer to talk it through? Call Alpine Stones at (503) 837-1980.
Building outside? Thickness rules change once the slab leaves the kitchen. See outdoor kitchen countertops in Portland for why 3cm is effectively mandatory on an exterior run.
Doing a small run like a vanity, bar top or hearth? You may not need a full slab at all. See countertop remnants in Portland for how to get 3cm real stone on a small footprint at a fraction of full-slab material cost. Call Alpine Stones at (503) 837-1980 and we will tell you what is on the remnant rack this week.
Structural Reality: Where Thickness Genuinely Matters
Marketing aside, thickness has real engineering consequences. Stone is strong in compression and comparatively weak in tension — it resists being crushed far better than it resists being bent. That's why unsupported spans are where thickness earns its money.
Overhangs. As a general rule of thumb for natural stone and quartz, 3cm material can cantilever roughly 10 to 12 inches unsupported, while 2cm material should be limited to about 6 to 8 inches. Beyond those numbers you need support — steel plate, corbels, or a plywood substrate. If you're planning a breakfast bar with counter-height seating and a 14 to 15 inch overhang for knees, that's not a "thicker is nicer" preference, that's a structural requirement with hidden steel underneath regardless of thickness.
Sink cutouts. Undermount sinks put a lot of stress on the narrow rail of stone in front of the bowl. 3cm handles that comfortably. 2cm undermount installs are absolutely doable — done constantly in Europe — but they want a rodded or reinforced front rail and a fabricator who's paying attention. If you're going 2cm with a large single-bowl undermount, ask specifically how the front rail is being reinforced.
Cooktop cutouts. Same logic. A drop-in cooktop leaves narrow strips of stone front and back. Thicker material is more forgiving, thinner material needs care during fabrication and transport.
Substrate. 2cm countertops in the US are typically installed over a plywood deck, which adds labor and material but also adds stiffness. 3cm installs directly to the cabinet frame in most cases. This is part of why the price gap between the two is smaller than the raw material cost difference suggests — you save on stone and spend it back on substrate and labor.
One thing that is not materially different: everyday durability. A 2cm quartz counter is not going to crack because you set a hot pan on it or lean on the edge. Failures in thin stone almost always trace back to an unsupported span, a poorly cut sink rail, or damage during handling — not to the thickness itself being inadequate for kitchen use.
Still working out a budget? Get an installed price from your own measurements in about two minutes with the Alpine Stones instant quote tool, or call (503) 837-1980 to talk it through with a real person.
Mitered vs. Laminated Edges: The Detail That Separates Shops
If you want a thick, substantial edge — 4cm, 6cm, or a chunky waterfall island — the fabricator builds it up. There are two ways to do that, and the difference in quality is enormous.
Laminated edge (stacked). A strip of the same slab is glued to the underside of the countertop edge, then the whole assembly is shaped and polished as one. It's faster and cheaper. The downside is the seam: because the strip is cut from a different part of the slab and butted flat against the underside, the veining rarely lines up and you can often see a horizontal glue line running the length of the counter. On a busy granite it disappears. On a white marble-look quartz with strong veining, it can be very visible.
Mitered edge. Both pieces are cut at a 45-degree angle and joined at the corner, so the top surface's veining wraps continuously around the edge. Done well, a mitered edge looks like the countertop was carved from a single thick block of stone. There is no visible glue line at the top corner, and on veined material the pattern flows over the edge exactly as it would in solid stone.
Mitering costs more because it's real work: precise angle cuts on a CNC saw, careful dry-fitting, color-matched epoxy, and hand polishing to knock down the corner so it reads as solid. It's also where you find out whether your fabricator has the equipment and the patience. A sloppy miter with a gap, a mismatched color epoxy, or veining that abruptly stops at the corner looks worse than a clean laminated edge would have.
Our general guidance for Portland-area homeowners: if you're spending real money on a dramatically veined slab, miter it. The entire point of a statement stone is visual continuity, and a laminated edge undercuts that at the most visible line in the kitchen. If you're working with a subtle, uniform material — a plain white quartz, a speckled granite, a concrete-look porcelain — a laminated edge is a perfectly sensible place to save money because nobody will ever see the difference.
How Thickness Changes the Look of a Room
Setting engineering aside, thickness is a design language. Different thicknesses say different things, and matching them to your architecture matters more than picking a "better" number.
2cm reads light, modern and European. A thin profile pairs beautifully with flat-panel slab cabinetry, minimalist hardware, and contemporary architecture. It's what you see in high-end Italian and Scandinavian kitchens. In a Portland modern build or a clean-lined condo remodel, a 2cm eased edge can look far more sophisticated than a chunky counter would.
3cm reads substantial and traditional-to-transitional. It's the American default for a reason — it looks solid, it suits Shaker cabinetry and framed doors, and it holds up visually in the larger kitchens common in Lake Oswego, West Linn and Camas. If your kitchen has any traditional detailing, 3cm is almost always the safer choice.
4cm to 6cm mitered reads architectural and intentional. This is the current high-end look: a thick, monolithic island edge, often paired with a waterfall panel down the sides. It signals custom work. Used well it's stunning. Used on every surface in the kitchen it starts to feel heavy, which is why most designers run the thick miter only on the island and keep the perimeter counters at standard thickness.
Scale matters. A thick edge on a small galley kitchen closes the space in. A thin 2cm edge on a twelve-foot island can look flimsy relative to the mass of the cabinetry beneath it. Walk your actual kitchen, look at the cabinet dimensions and ceiling height, and pick the profile that's proportional — not the one that photographed well on Pinterest in someone else's house.
Vanities are their own category. Bathroom countertops carry no real structural load and read better thin. 2cm on a vanity is not a compromise, it's frequently the better design call — and it lets you spend the savings on a nicer slab or an integrated stone sink.
Cost, Availability, and What to Ask Your Fabricator
On cost. Per square foot of raw slab, 2cm runs meaningfully less than 3cm in the same material — you're buying less stone. But the installed price gap narrows considerably once you add the plywood substrate, extra labor, and any edge build-up. If you take 2cm and then miter it to look like 3cm, you will typically spend more than just buying 3cm in the first place. The honest cost hierarchy, cheapest to most expensive, usually runs: 2cm eased edge → 3cm eased or standard profile → 2cm laminated to 4cm → 3cm mitered to 6cm → waterfall island with book-matched miters.
On availability. This is the practical constraint that decides it for a lot of people. In the Pacific Northwest, the deepest inventory of quartz and granite is in 3cm. Many exotic and designer slabs simply don't come to this market in 2cm. Porcelain, by contrast, is mostly thin. If you have your heart set on a specific slab, its available thickness may make the decision for you — which is one more reason to look at real slabs early rather than choosing from a two-inch sample chip.
Questions worth asking any shop you're quoting:
What thickness is this quote based on, and is the edge build-up mitered or laminated?
If it's laminated, will the glue line be visible on this particular slab's pattern?
What's my longest unsupported overhang, and what support is specified?
Is the sink rail being rodded or reinforced?
If 2cm — is plywood substrate included in this price, or is it an add?
For where thickness lands in a full budget, see our 2026 Portland and Vancouver WA countertop cost guide. A good fabricator will answer all five without hesitating. If the answers are vague, that itself is useful information.
Frequently asked questions
Is 2cm or 3cm countertop thickness better?
Neither is universally better. 3cm (about 1-1/4 inch) is the dominant residential standard in the United States, stands on its own and takes a true undermount sink. 2cm (about 3/4 inch) is correct and cost-effective for bathroom vanities, vertical work and commercial applications, but in a kitchen it needs a plywood substrate and usually a built-up edge.
Does a 2cm countertop actually save money?
Less than people expect. The slab costs less per square foot, but the substrate and the laminated or mitered edge buildup add fabrication labor that eats much of the saving. The question to ask your fabricator is whether the substrate and edge buildup are inside the quoted number or added later.
Can a 2cm slab look as thick as 3cm?
Yes. Slab thickness and finished edge thickness are not the same thing. A 2cm slab can be laminated or mitered to read as 3cm, 4cm or even 6cm at the edge, and a 3cm slab can be built up to a dramatic waterfall edge. The slab is the raw input; the edge is a fabrication decision.